
Website widget & forms
Add a chat/voice widget and contact forms to your website.
Website widget & forms
Let visitors reach your agent right from your website — with a chat and voice widget, and embeddable contact forms. Both are set up in the agent editor's Channels tab.
Add the widget to your site
- In the agent editor, open the Channels tab and create a widget key.
- Lock the key to the domains you'll embed on (so a copied snippet can't run on someone else's site).
- Copy the install snippet and paste it into your site's HTML, just before the closing
</body>tag.
That's it — the widget appears on your site. Each key has its own snippet, so you can install on more than one site.
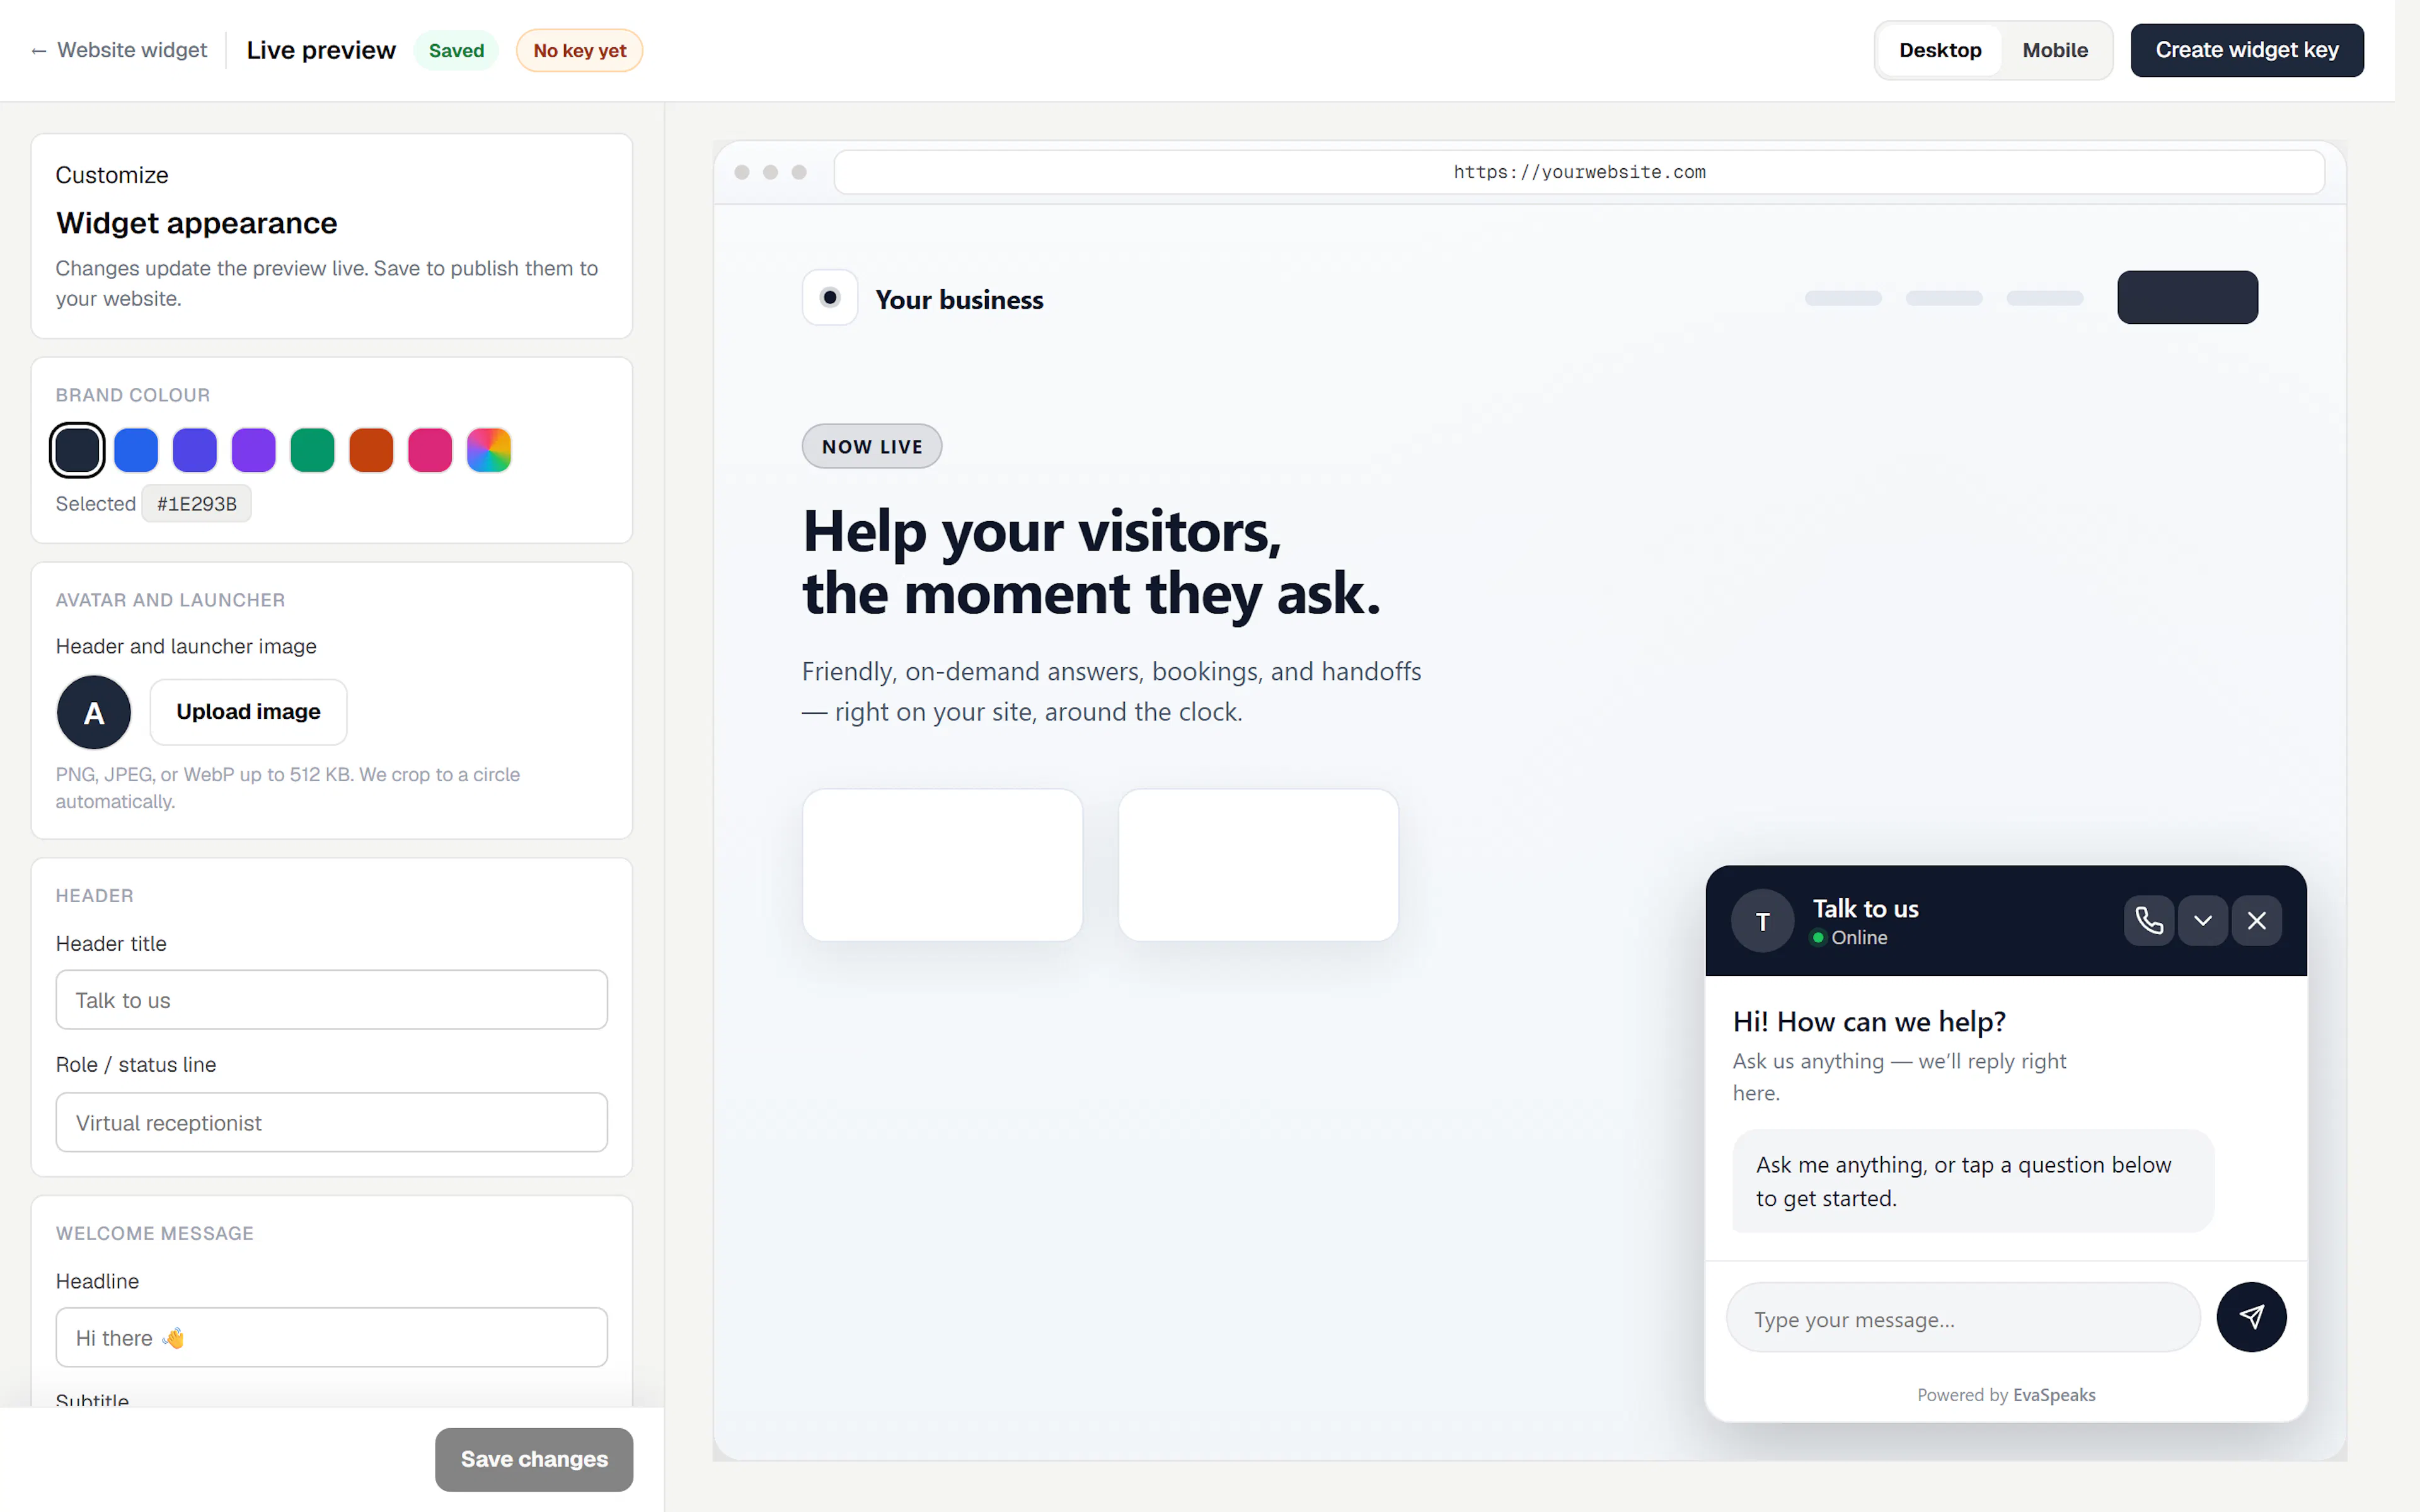
Customize it in the Widget Preview Studio
Open the Widget Preview Studio to design how the widget looks and behaves. It shows the real widget on a mock landing page, and every change previews live as you make it.
You can set:
- Appearance — brand color, header, welcome message, launcher icon or image, position, and light/dark theme.
- Chat vs voice — the surface visitors get when they open the widget.
- Suggested questions — starter prompts shown in the panel.
When it looks right, click Save changes to publish the look to your website.
Contact forms
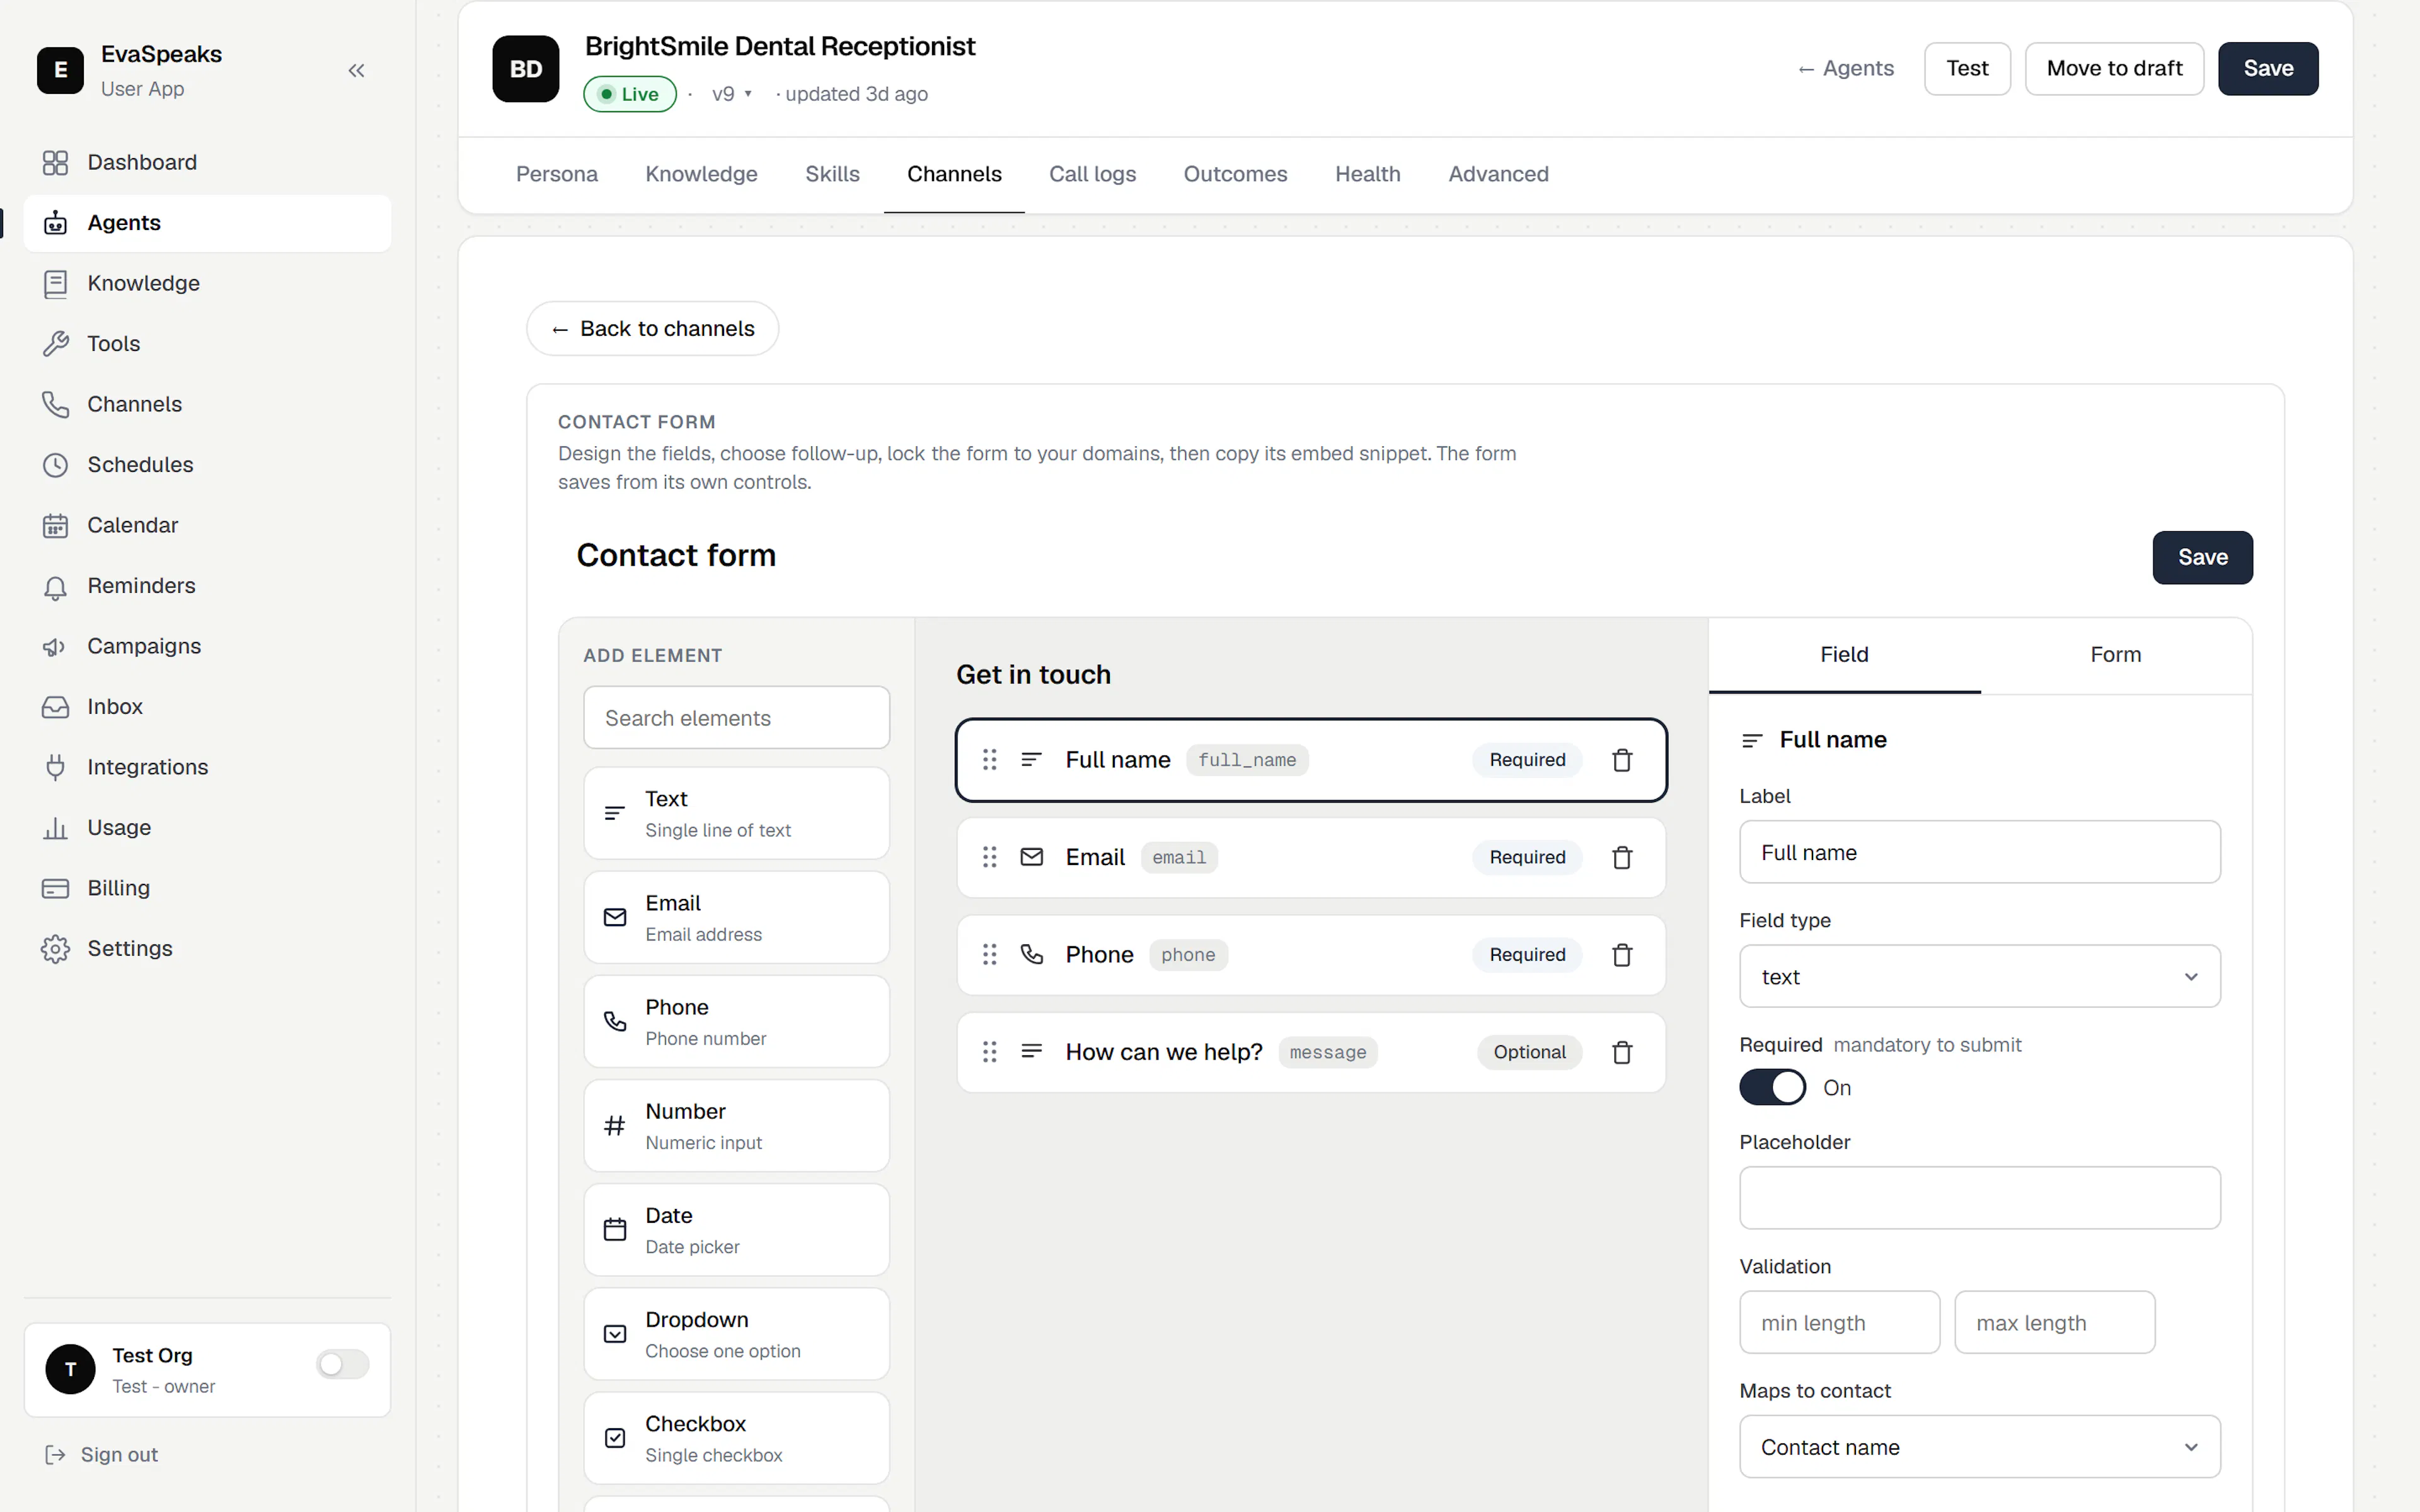
Build an embeddable enquiry form in the contact-form builder, also reached from the agent editor's Channels tab.
- Click Create contact form.
- Drag fields from the palette onto the form (or click to add them), and reorder by dragging.
- Select any field to edit its label, type, and whether it's required.
- Set the form's design and what happens on submit, then Save.
- Copy the embed snippet and paste it where the form should appear on your site.
Submissions land in your Inbox, so every lead is in one place — see Monitor & analytics.